
If you keep getting error message when you open Wondershare Filmora, experience unexpected crashes or freezes while using Wondershare Filmora, or you just no longer need this all-in-one home video editor anymore and want to free up more system space, then uninstalling Filmora will be the first step to solve your problem. Most people choose to uninstall Wondershare Filmora from the Control Panel, but this way might leave some related components and its files behind. Therefore, you still locate and remove any additional supporting files and registry entries step by step. This tutorial will show you the correct ways on how to uninstall Wondershare Filmora completely.
What is Wondershare Filmora?

Wondershare Filmora (as known as Filmora 9) is a superb video and slideshow editor developed by Wondershare Technology that comes with simple and stylish interface and powerful video editing capability. It is the most powerful video editor alternative to Windows Movie Maker & iMovie, and available for Mac and PC. Wondershare Filmora makes producing your own video easier than ever. It combines photos and video clips, and you can apply effects and filters to turn them into a mini shareable movie. You can even add a unique sound mix for your pleasure. Whether you want to merge, split, trim, crop, cut and paste video clips to make your video unique, Filmora has all covered. It also supports all modern video formats, as well as HD and 4K video editing and output. Filmora 9 is a premium product but you can also use it for free if you don’t mind exported videos are watermarked with a Filmora banner across the bottom third of the output. The price of Windows version is $39.99 (1-year license), $59.99 (lifetime license) and $99.87 (1 Year Filmora 9 License + 1 Year Filmstocks Standard Plan: unlimited downloads).
About Wondershare Filmora Removal
You might love the features of Filmora 9 but there are times you have no choice to uninstall the program because it doesn’t function properly. Most people complain the major problem of Wondershare Filmora is it crashes constantly, and sometimes it goes slow. For example, importing an image can take 30 seconds, and Filmora 9 will freeze almost at every action and will go unresponsive for up to 20 seconds before letting the user perform a task. This is a pain for them so uninstalling and reinstalling Wondershare Filmora might be a solution to solve the issue. And some people choose to uninstall Filmora just because they feel it expensive or Filmora doesn’t include the feature they want. They no longer need Wondershare Filmora anymore. Whatever the reasons will be, if you decide to say goodbye with Wondershare Filmora, you need to uninstall the program as well as get rid of all the residual files and settings that it leaves behind. Without a complete uninstallation, it will only cause trouble for you in the future. Follow the instructions below to uninstall Wondershare Filmora and its leftovers step by step.

Uninstall Wondershare Filmora Manually on Windows 10 (For Advanced Users)
Method 1: Removal from Start Menu
If you want to uninstall a program from a Windows computer, it always takes more than dragging and dropping the program icon to the Recycle Bin. For Windows 10 users, you can directly uninstall Wondershare Filmora from Start menu, where displays an alphabetical list of all your installed Windows apps and desktop apps.
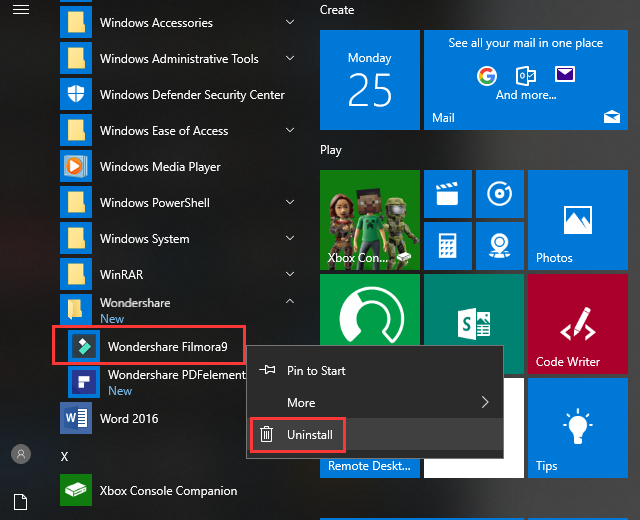
To do this, click Start > All apps to view the list of apps on your PC in the Start menu (bottom-left). Scroll to Wondershare Filmora9, then right-click it and select Uninstall. (If you can’t find Wondershare Filmora in the Start menu, or it won’t let you uninstall, you can try other methods listed below.)
Method 2: Removal via Apps & Features
In some cases, you cannot find an app or program that you want to uninstall in the Start menu. So, you can try this way to remove it from the Settings Menu.
Here’s what you need to do:
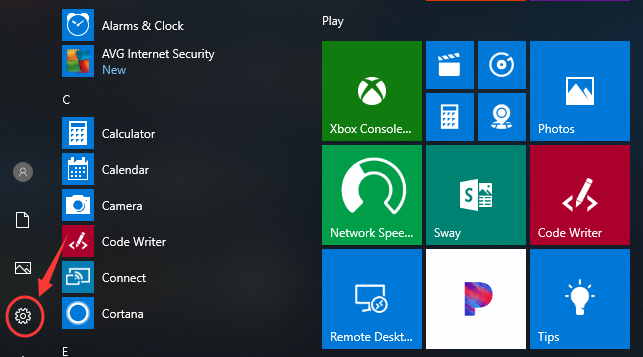
1. Open the Settings menu by pressing the Start icon and then the gear in the left.
2. Choose System and then click Apps & features. This will open a list of all your applications. Find out Wondershare Filmora from the list.
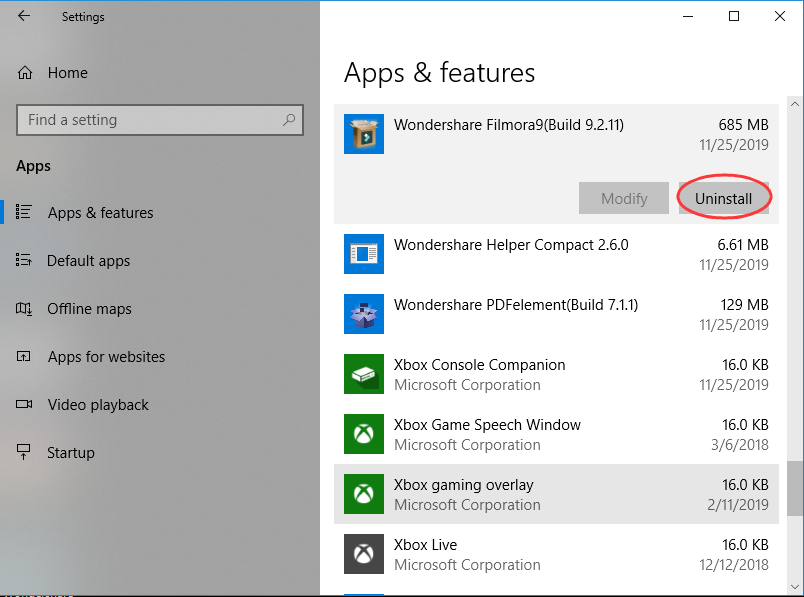
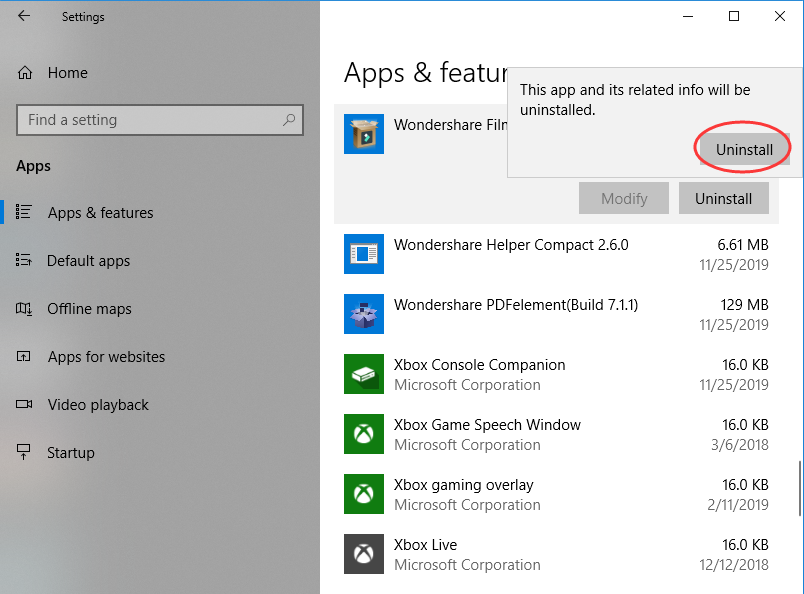
3. Select Wondershare Filmora9 and Click Uninstall to start the removal process. You will see a pop-up window informing you that the app and its related info will be uninstalled, then you just need to hit Uninstall to confirm the removal.
Method 3: Removal through Programs and Features in Control Panel
If the above methods are not working, you can try uninstalling Wondershare Filmora from Control Panel. Control Panel option is still available in the latest edition of Windows 10. The Programs and Features Control Panel applet is Windows 10’s built-in uninstaller. Users can remove most software from here.
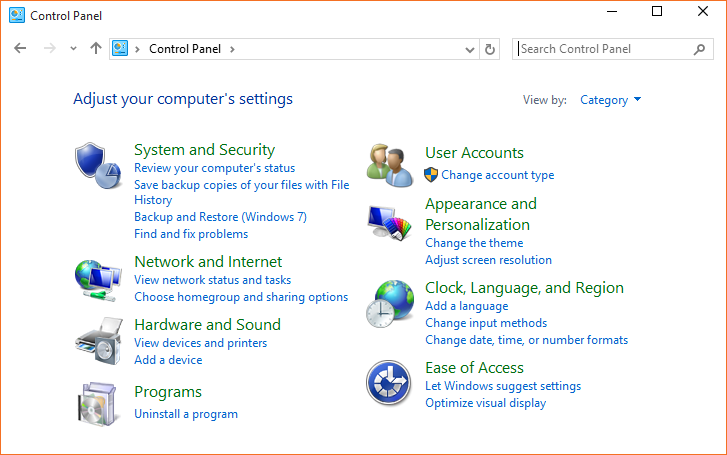
1. Right-click on the Start button (Windows logo button at the bottom-left corner of the desktop) and then click Control Panel to open it.
2. Go to Programs and Features (or go to Uninstall a Program if your Control Panel is in the category view).
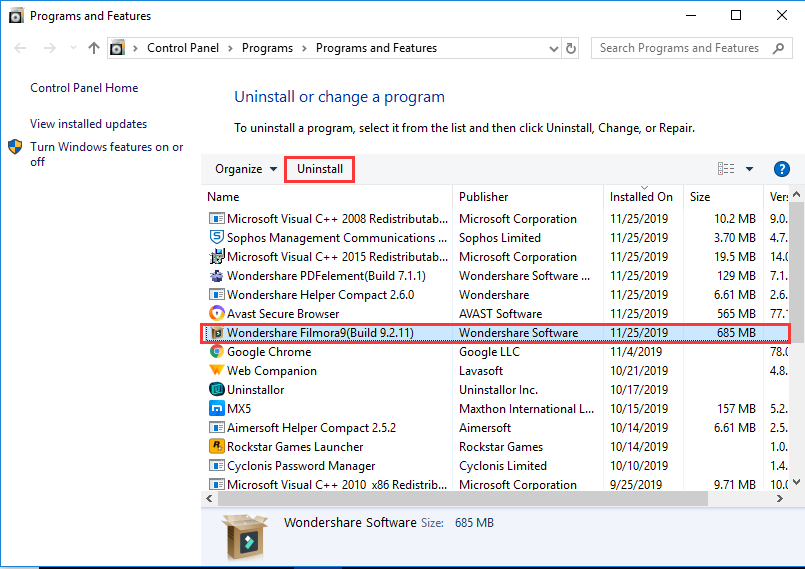
3. Select Wondershare Filmora and click Uninstall.
You’ll see a pop-up window asking if you’re sure you want to uninstall this program, click Yes and click through the uninstall wizard, if applicable.
*IMPORTANT STEP: Delete Wondershare Filmora leftovers.
The built-in Windows uninstallers will get the Wondershare Filmora removal job done, but they may not get it done cleanly. Common leftovers like its registration files, empty folders, dll files, invalid registry entries and more could leave behind after the program is removed. If you want to keep your Windows environment as clean as possible, you should wipe Wondershare Filmora leftover files off and remove all the leftover keys and entries from your system registry.
Warning: Before you get started, please back up all your important data first in case incorrect changes to the registry result in permanent data loss or corrupted files.
Check the following folders and delete associated files first.
- Press the Windows logo key + S shortcut on your keyboard.
- Type %programfiles%, %AppData%, and %Temp% in sequence into the Search box
- It will open ProgramData folder, AppData folder and temp folder.
- See if there are any folders there that have the name of Wondershare Filmora. Delete such folders.
Next, you have to delete Wondershare Filmora entries from Windows registry.
Press Windows + R, and type in regedit in RUN box, then press Enter. It’ll open Registry Editor.
Locate the following keys:
- HKEY_CURRENT_USER\Software\Microsoft\Windows\CurrentVersion\
- HKEY_LOCAL_MACHINE\SOFTWARE\Microsoft\Windows\CurrentVersion\
- HKEY_LOCAL_MACHINE\SOFTWARE\Wow6432Node (64-bit system users will also need to check this extra key)
If you can find any keys with the name of Wondershare Filmora, just delete such keys.

Uninstall Wondershare Filmora Automatically with a Third-Party Uninstaller (RECOMMENDED)
Manual removal instructions could be complicated for you if you have no experience in editing registry or handling system files and folders. As such, you can consider using a third-party uninstaller instead. For example, Uninstallor – a lightweight, effective and fast uninstaller can help you erase all software residual files and registry entries with just 3 easy steps. It scans your files, folders, and/or Registry entries automatically and displays every trace of Wondershare Filmora9 left on your system. It can completely remove any desktop applications, Windows apps, and even browser extensions for you.
Here’s how it works:
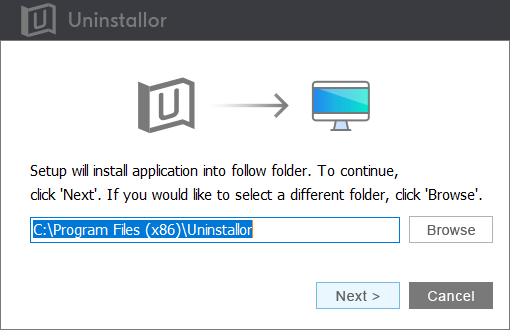
1. Download & Install Uninstallor.
Uninstallor is quite lightweight and the installation is straightforward. The only option you have is to let you create a program shortcut to the desktop.
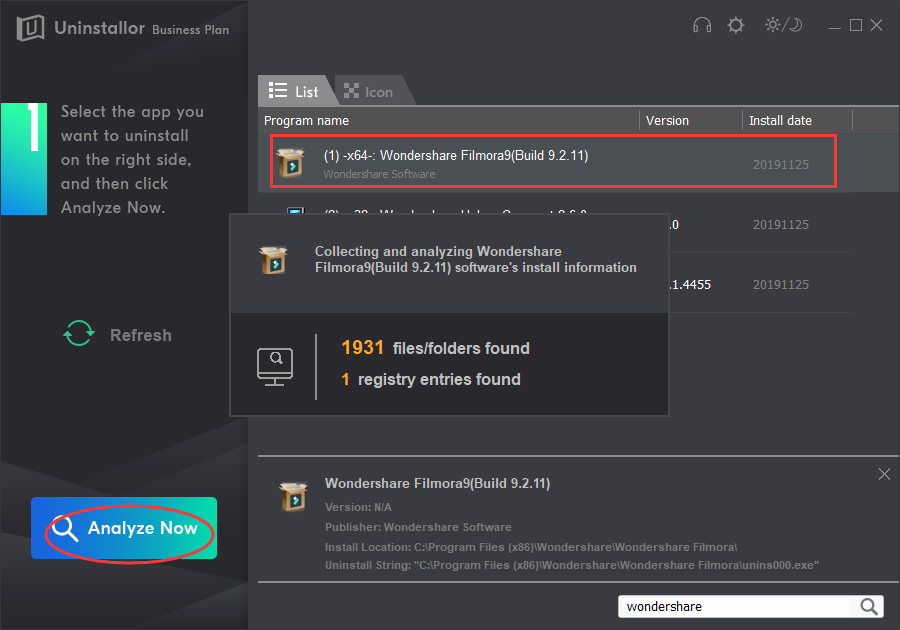
2. Analyze.
When Uninstallor is started, its main window fills with the programs installed on your computer. Select Wondershare Filmora9 and click on Analyze Now button, then it will analyze all the data associated with Wondershare Filmora and search for all its leftover files.
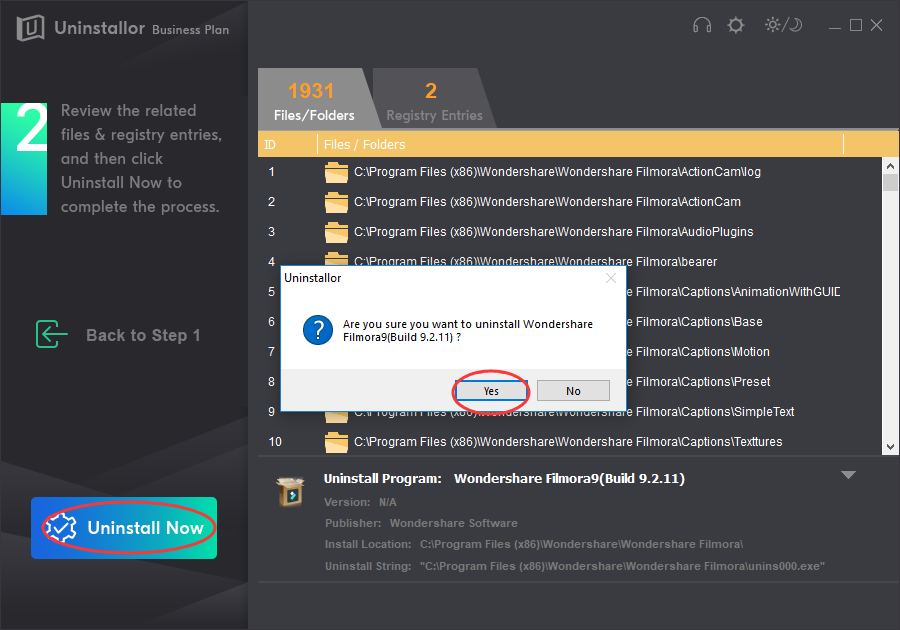
3. Uninstall.
Click on “Uninstall Now” button to uninstall Wondershare Filmora completely. Next, you need to click on “Yes” to confirm the removal.
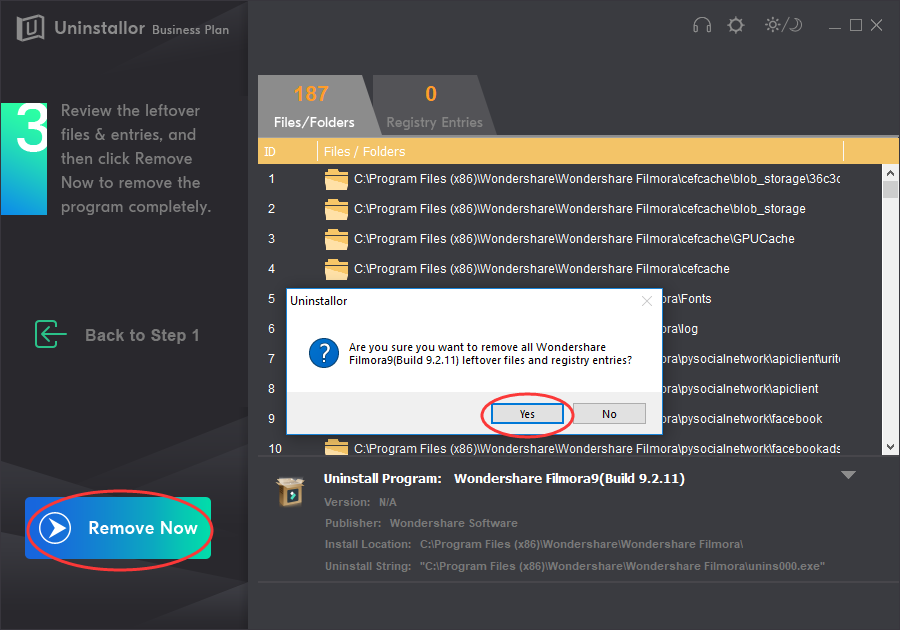
4. Remove.
Click Remove to clear all the components for Wondershare Filmora, then you’ll see a report telling you how many items of Wondershare Filmora9 have been completely removed. Roboot your computer to take effect.
Video Guide on How to Uninstall Wondershare Filmorae
Conclusion:
Sometimes Wondershare Filmora can misbehave due to missing or corrupt files so uninstalling and reinstalling Filmora will be an option to troubleshoot the problem. Most people uninstall application via Start menu, Apps in the Settings, or Program and Features in the Control Panel, but they don’t realize these methods could leave files and registry entries behind. These residual files, folders, and registry settings stay in the PC eating up system resources and may cause system slowdown issues. Worse still, it could cause problems when you reinstall the program or other new video editors. If you need to clean up the stuffs, you have to get the knowledge and ability to handle Windows registry where is a dangerous place for computer system. If you mess up with it, you can inadvertently break your system. Thankfully, there are some uninstaller tools that can remove every trace of a program easily. Therefore, you can use it to uninstall Wondershare Filmora with no efforts.
Uninstallor is our favorite uninstaller that combines with premium support team, giving you the best service to delete any unwanted programs. It will do a scan for leftovers automatically and remove them with one click. You can use this all-in-one uninstallation utility to uninstall software, bundleware, browser extensions, and Windows Apps together for a clean and safe PC. With Uninstallor, the Wondershare Filmora removal can be finished in just a moment. What are you waiting for?
Published by Tony Shepherd & last updated on December 6, 2019 2:30 am


Leave a Reply
You must be logged in to post a comment.