
“I’ve had MediaMonkey installed on my PC for months now and was getting along with it quite nicely. But today I launched MediaMonkey and I was greeted with an error message saying something about Error executing SQL. I don’t know what that exactly means. Now I am wondering if reinstall MediaMonkey helps to fix the issue, and if it does help, how do I uninstall MediaMonkey from my Windows 10 PC completely?”
If for some reason, your installation of MediaMonkey is corrupted, MediaMonkey is not functioning, or you no longer wish to use it, you may need to uninstall MediaMonkey. The most common method that we uninstall a program from Windows is through control panel. However, this method does not completely remove all the entries of the file. Remnants of MediaMonkey can remain on your hard drive, slowing down your PC. In this post, we are going to show you the proper way to let you completely remove MediaMonkey and its leftovers effectively.
What is MediaMonkey?
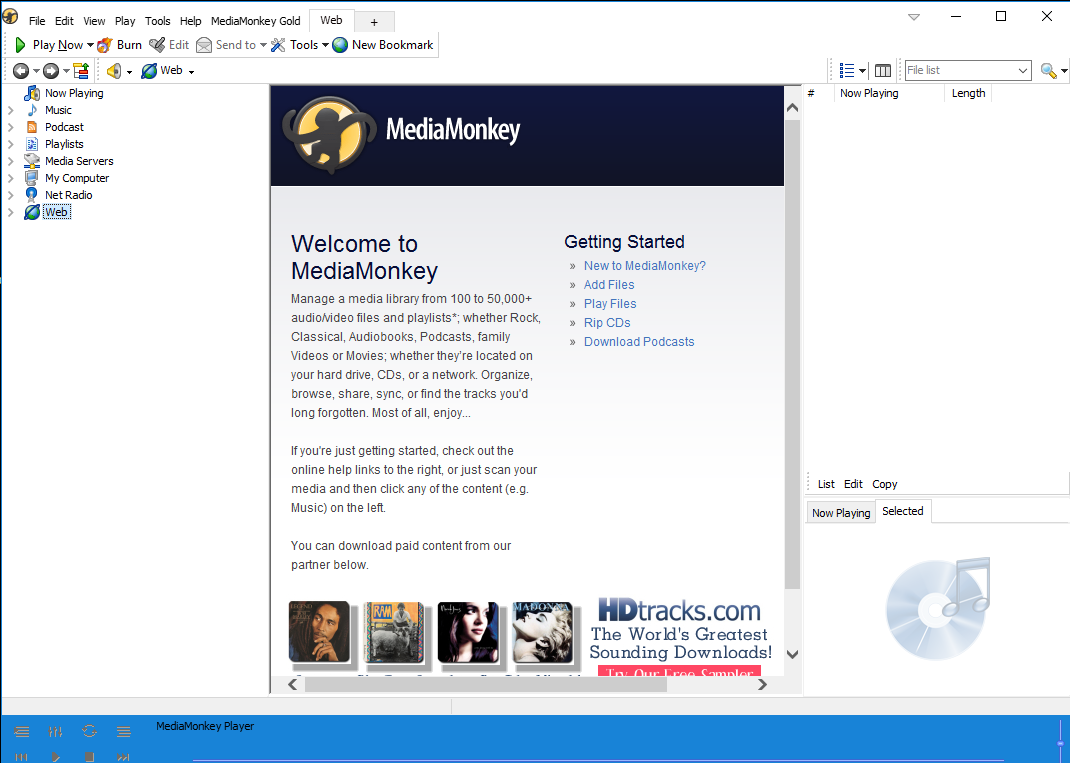
MediaMonkey is one of the most powerful free media players around. This software is available on Windows operating system and Android, and you can also use it to sync to Apple devices (iOS devices require iTunes to be installed), converting and leveling tracks on-the-fly. MediaMonkey has a powerful simple user interface that can help you organize your entire music library, add missing album artwork, find lyrics, etc. Being as the media organizer for serious collectors, MediaMonkey supports over 15 languages and it can handle collections containing hundreds of thousands of videos and audio tracks effortlessly. It can grab files from virtually any source, whether they are stored locally, on a networked device, on a disk, or streamed from an online source. If your collection is a mess, MediaMonkey can automatically lookup and intuitively tag album art, lyrics and other metadata for you. In addition, you can create Playlists, record CDs to your hard drive, convert audio or video files, burn audio CDs with ease by using MediaMonkey. MediaMonkey can also be easily customized with skins, plugins, visualizations, etc.
MediaMonkey is free to use, but it also offers a Gold version for people who looking for advanced features like accurate-rip database that allows you to accurately rip any media and match it to the database, unlimited MP3 encoding, Virtual CD / Previews & Sleep Timer and more. Overall, MediaMonkey is both a media organizer and a digital media player for serious music lovers.
What is The Proper Way to Uninstall MediaMonkey?
Being as one of the best music players in the world, MediaMonkey is loved by millions. But, for some kind of reasons, there are still a few of people need to uninstall the program from their machine. The common reason they need to uninstall MediaMonkey is they often get database errors or data corruption while using MediaMonkey, so they will have to end up clicking “cancel” in some dumb cryptic error prompt and/or restart MediaMonkey, which is quite annoying.
When it comes to uninstall MediaMonkey from Windows, the Windows Control panel is usually your first port of call, but actually it’s not always enough and the worse is this method doesn’t always work. You might find MediaMonkey is not listed there or the “Uninstall” option is grayed out so you are unable to click on it. Even you’ve removed MediaMonkey software from there, there could be many remnants left in the registry and hard drive. These leftovers may not pose a major threat. But, they tend to slow down your machine so there is no point of keeping them. Thus, a perfect solution to uninstall MediaMonkey from Windows should involve in removing the software itself as well as its associated files and registry entries. Now you can follow the instruction below to remove MediaMonkey from your computer without leaving a trace. You can choose to uninstall MediaMonkey manually if you are an advanced user, or rely on a third-party uninstaller for a quick fix.

How to Completely Uninstall MediaMonkey on Windows 10?
Method 1: Removal from Start Menu
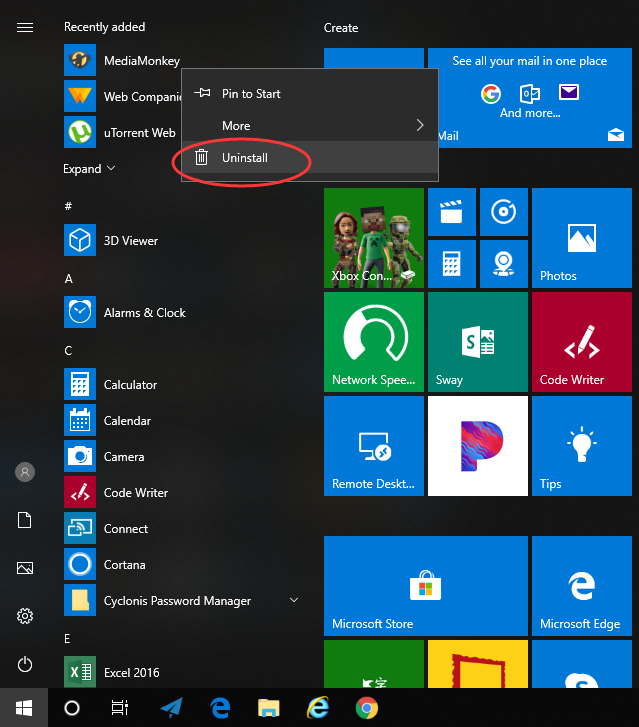
You can uninstall MediaMonkey directly from the Start menu. To do this, go to Start > All apps and find the MediaMonkey. Right-click on it and then click Uninstall from the drop-down menu that appears. If you can’t find MediaMonkey in the Start menu, you can try other methods listed below.
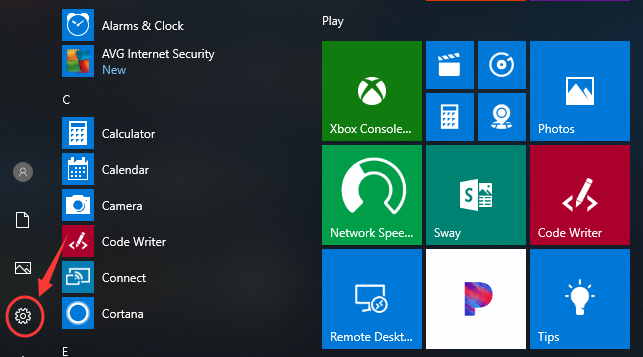
Method 2: Removal from The Settings Menu
In some cases, you cannot find an app or program that you want to uninstall in the Start menu. So, you can try this way to remove it from the Settings Menu.
Here’s what you need to do:
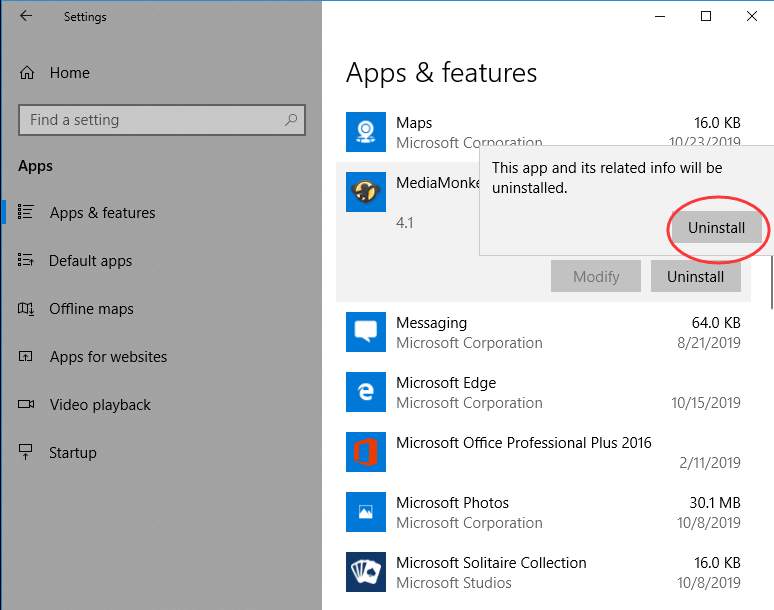
1. Go to Start->Settings.
2. Choose System and then click Apps & features. Here, you’ll see a full list of applications and programs on your computer, sorted by size. You can use the search box at the top of the screen to search for apps, and you can resort the list by name or by install date.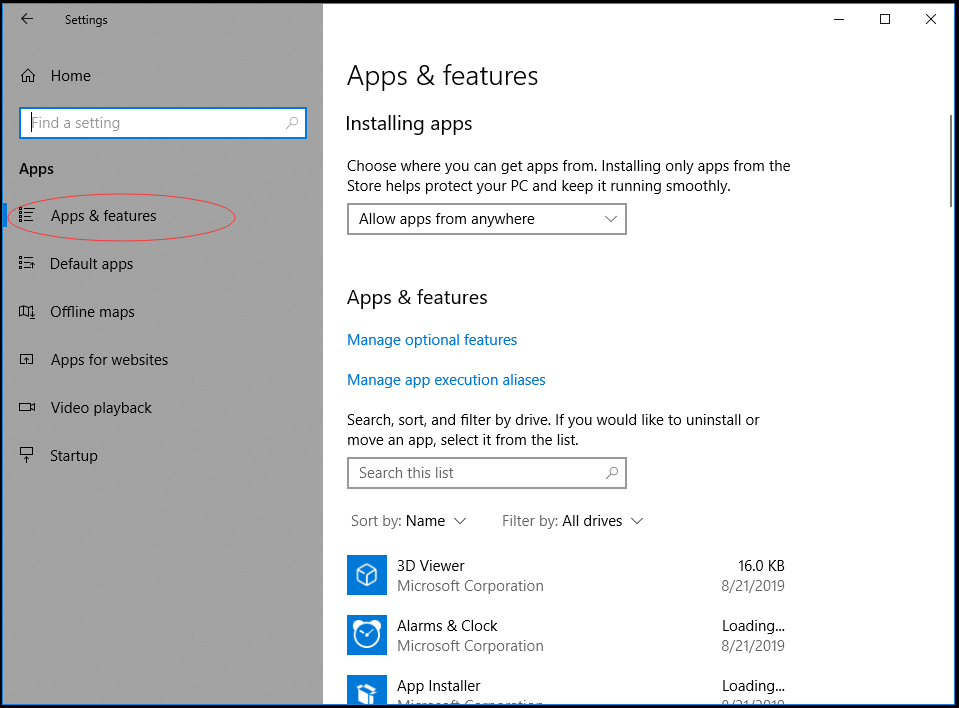
3. Select MediaMonkey and Click Uninstall to start the removal process. You will see a pop-up window informing you that the app and its related info will be uninstalled. Hit Uninstall to confirm the removal.
Method 3: Removal through the Add/Remove Programs Control Panel
If you prefer using Control Panel, that option is still available in the latest edition of Windows 10. However, from the Control Panel, you can only uninstall the desktop programs, not apps. Do the following:
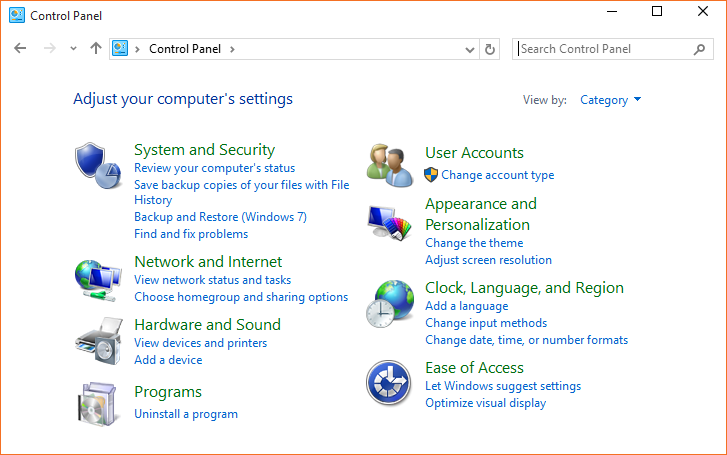
1. Right-click on the Start button (Windows logo button at the bottom-left corner of the desktop) and then click Control Panel to open it.
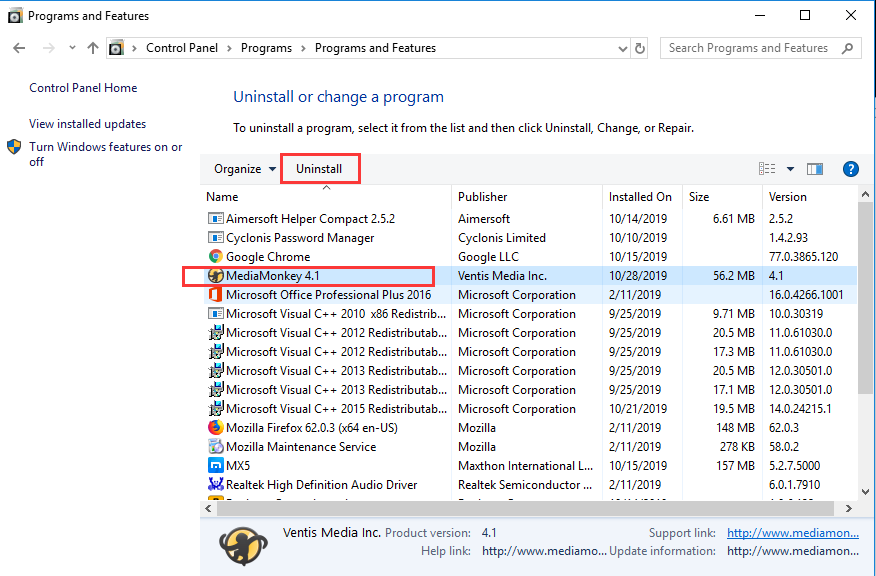
2. Go to Programs and Features (or go to Uninstall a Program if your Control Panel is in the category view).
3. Right-click MediaMonkey and select Uninstall. You’ll see a pop-up window asking if you’re sure you want to uninstall this program, click Yes and click through the uninstall wizard, if applicable. After it is done, it will prompt the users to Reboot their computer to take effect.
WARNING:
The above three methods may help you uninstall MediaMonkey itself successfully, but they cannot delete MediaMonkey leftovers for you. Common leftovers include its registration files, empty folders, dll files, invalid registry entries and more. So, in the next step, you have to manually delete leftover file system and registry items. It’s important to do a backup before deleting anything from the Windows registry so that if something goes wrong, you can restore the system to its earlier state.
Check the following folders and delete associated files first.
- C:\Program Files\
- C:\Program Files (x86)\
- C:\Users\Administrator\AppData
Next, you have to delete MediaMonkey entries from Windows registry:
Press Windows + R, and type in regedit in RUN box, then press Enter. It’ll open Registry Editor.
Locate the following keys:
- HKEY_LOCAL_MACHINE\Software\Microsoft\Windows\CurrentVersion\Run\
If you can find any keys with the name of MediaMonkey, just delete such keys.
Note:
If you are having issues while trying to uninstall MediaMonkey manually, you can use Uninstallor to completely remove this program for you in just a couple minutes. Uninstallor is the industry-leading third-party uninstaller that uninstalls programs right away (even the most stubborn ones), without leaving any files and Windows registry entries behind. One Scan. Three Easy Steps. Fast Removal & No Leftovers.

Method 4: Uninstall MediaMonkey Using Uninstallor (Recommended)
Compared to the Windows built-in uninstaller, Uninstallor can do a better job of deleting an application completely. Here’s how it works:
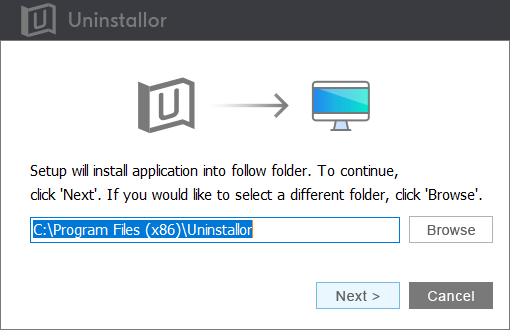
1. Download & Install Uninstallor on your machine. Uninstallor is quite lightweight and the installation is straightforward. The only option you have is to let you create a program shortcut to the desktop.
2. Launch Uninstallor. Uninstallor comes with an easy-to-use interface and it lets you switch to dark or light theme as you wish.
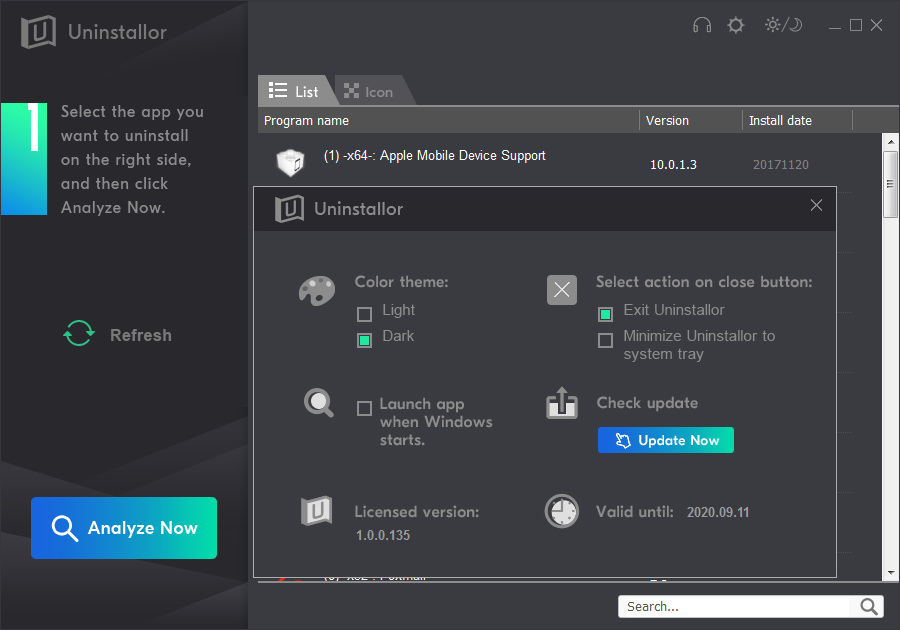
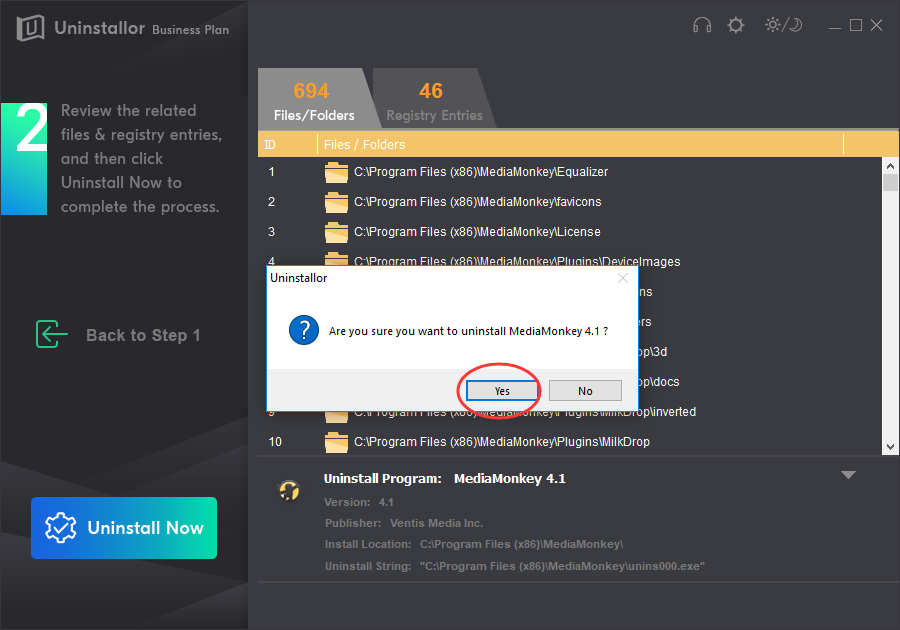
3. Scan for program components. Select the program that you want to uninstall and click on “Analyze Now” button. It will analyze all the data associated with the uninstalled program and searches for all leftover files.

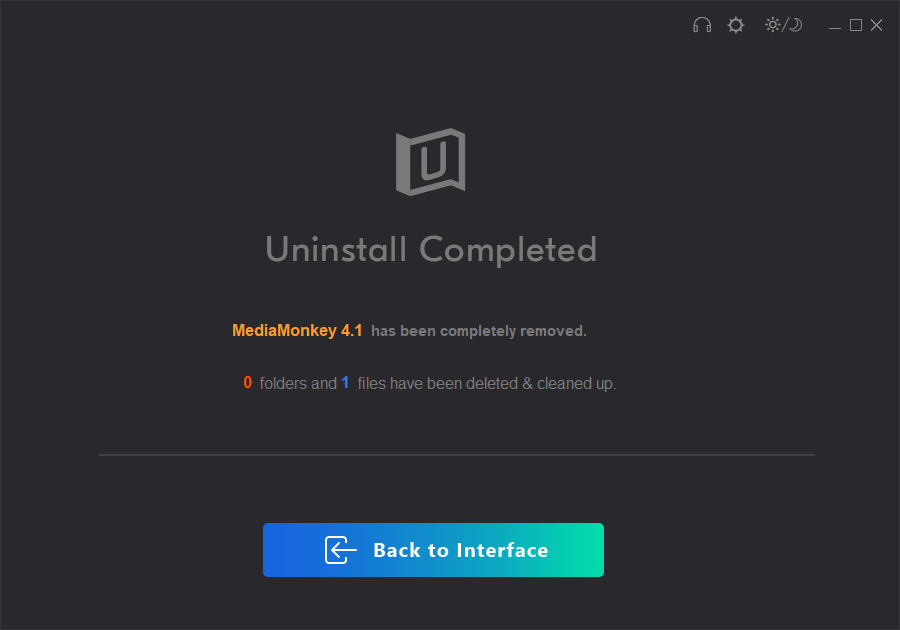
4. Perform complete removal. Click on “Uninstall Now” button to uninstall MediaMonkey completely. Next, you need to click on “Yes” to confirm the removal.
5. Wait until the uninstallation is completed. When the process is completed, restart your computer to take effect.
Video Guide on How to Uninstall MediaMonkey
Conclusion:
Uninstalling MediaMonkey is supposed to be a straightforward task, but sometimes it can be difficult to remove it completely. You have to remove any traces of the MediaMonkey and its database, including its program files that contain any scripts, plugins, and configuration files that you may have added, and its registry entries, dll files and more. In this post, we have introduced two methods to let you remove MediaMonkey completely. The manual removal method is for computer talents. If you haven’t had experience in editing registry or dealing system files, you can get third-party programs instead, which are easier, faster, and safer to use. With hundrends of thir-party uninstallers, Uninstallor stands out from its competitors because it is easy-to-use and it has the strong ability to clear the unwanted program and its leftovers out of system automatically. Uninstallor works perfectly when a program won’t uninstall using Windows Uninstaller or when you suspect that a program didn’t uninstall completely. Can’t uninstall MediaMonkey by yourself? Get Uninstallor for a trial & Uninstall It Right Away!
Published by Tony Shepherd & last updated on November 14, 2019 2:02 am


Leave a Reply
You must be logged in to post a comment.