
Don’t know how to remove Reimage Repair completely from your PC? Is there a good way to uninstall it away? “Hi there. Earlier today, I was browsing the web and then I got a pop-up telling me I had 400+ errors, 1 malicious worm, and other clutter on my system and it required me to pay $70 for a program called Reimage Repair to get rid of them. Although I clicked “no thank you”, since then, using my computer for the internet has become a nightmare. Whenever I opened a page, whether it’s on Firefox or Chrome, it opened another website called something like Reimage or Reimage Plus in a new tab. On my desktop I noticed Reimage Repair was installed without my permission. I didn’t need this stuff, so I decided to uninstall it. I got a warning saying that “An attempt has been made to uninstall Reimage. This may be an admin generated action, but could also be the results of a virus or malware attack. Allowing this action will leave your computer unprotected.” Is that true to the claims? Can I uninstall Reimage without concerns about lack of protection? How do I remove Reimage Repair safely and completely? I also want my browser fixed. Please help.”
About Reimage Repair
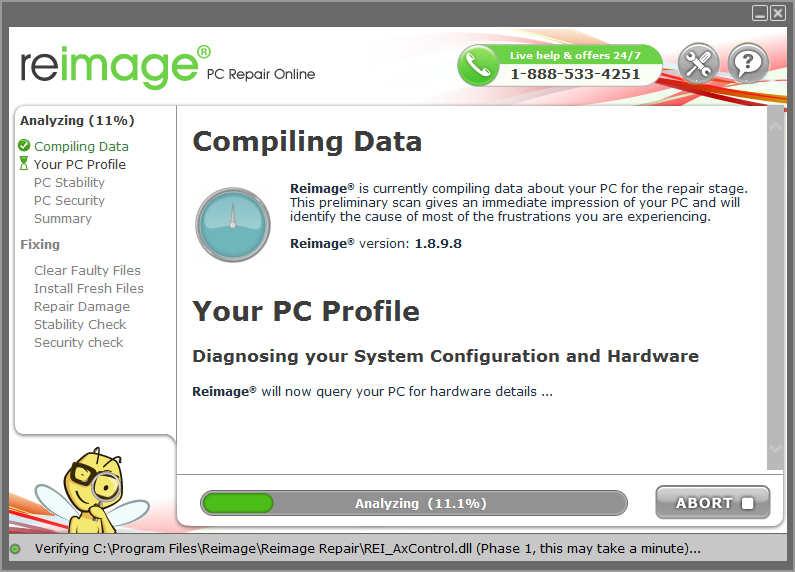
Reimage Repair (as known as Reimage PC Repair) is not a virus, but the program did have many negative comments and reviews due to its aggressive hard-sell advertising. It’s an online PC repair utility that allows you to revive the life of your computer system. It fixes all kinds of computer problems for you, no matter your PC is infected with kind of malware infection or you are suffering from Windows errors, BSOD, registry problem, computer freezing and any other problems. Generally, this program works in this way: it scans and diagnoses your computer system, displays a summary of your computer’s hardware, stability & security, and then recommends you to activate your license key in order to start repairing your PC. Price starts at $69.99/year for one license with 60 days money-back guarantee.

Reimage Repair Removal:
Reimage Repair is advertised as a system optimizer helping people cleaning faulty files, fixing system errors and safeguarding the computer from malicious virus, but there are still chances you may need to uninstall this product from your system. For example, unexpected errors occur when you are using Reimage Repair, or you don’t want to pay for its full version and continue its service. Sometimes, people who have Reimage Repair installed may find their browser was filled with many false advertisements claiming hundreds of system errors and viruses found. When they open a file or browse the web, it will constantly display misleading messages to convince them to buy the full version that offers to eliminate the alleged viruses. So they suspect that this application might contain some malicious components and want to get it off the system. No matter what the reason makes you want to uninstall Reimage Repair, please keep in mind that it is very important to take an effective way to remove it without leaving any remaining registry entries, files and folders. Otherwise, you may encounter the following problems:
- Incomplete removal error occurs.
- Unexpected pop-up ads appear in places they shouldn’t be.
- Your web browser’s homepage has mysteriously changed without your permission.
- Computer becomes slower than before.
Considering the Windows removal tool (Add/Remove Programs) is often insufficient to remove a stubborn program like this, the following guide contains step by step instructions on how to remove Reimage Repair completely from the system, including its leftovers like the empty registry keys, folders in your C drive, program data, and application shortcuts etc. You can choose to delete it manually, or use a third-party uninstaller to delete Reimage Repair easily.
How to Completely Uninstall Reimage Repair from Windows 10?
Method 1: Removal from Start Menu
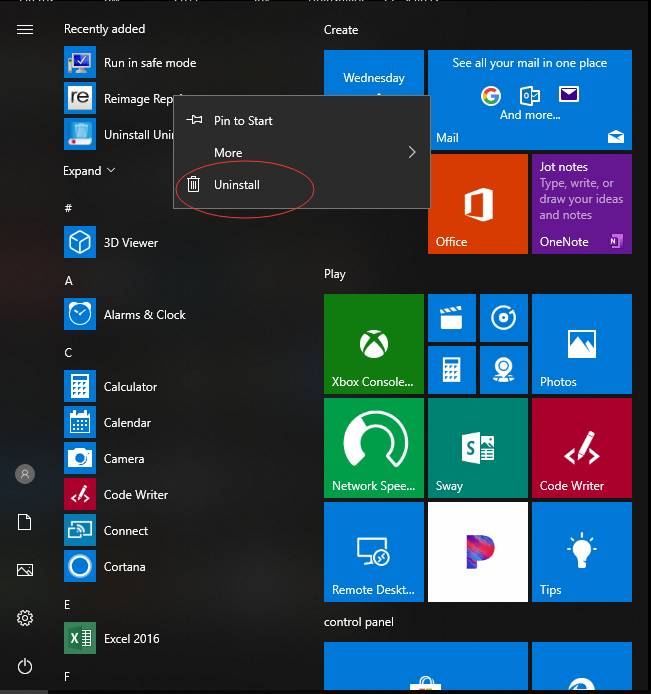
You can uninstall Reimage Repair directly from the Start menu. To do this, go to Start & All apps and find the Reimage Repair. Right-click on it and then click Uninstall from the drop-down menu that appears. If you can’t find Reimage Repair in the Start menu, you can try other methods listed below.
Method 2: Removal from The Settings Menu
In some cases, you cannot find an app or program that you want to uninstall in the Start menu. So, you can try this way to remove it from the Settings Menu.
Here’s what you need to do:
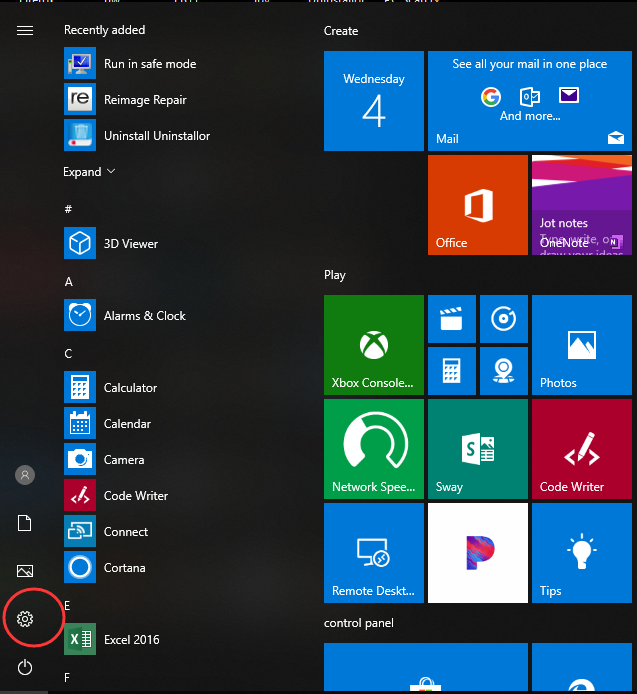
1. Go to Start & Settings.
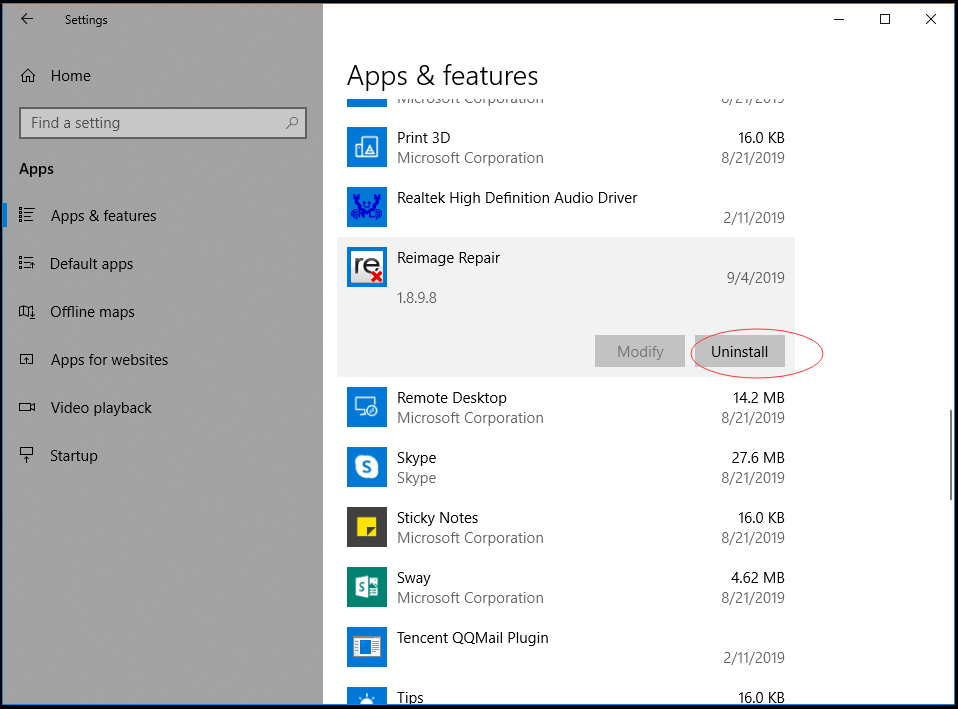
2. Choose System and then click Apps & features. Here, you’ll see a full list of applications and programs on your computer, sorted by size. You can use the search box at the top of the screen to search for apps, and you can resort the list by name or by install date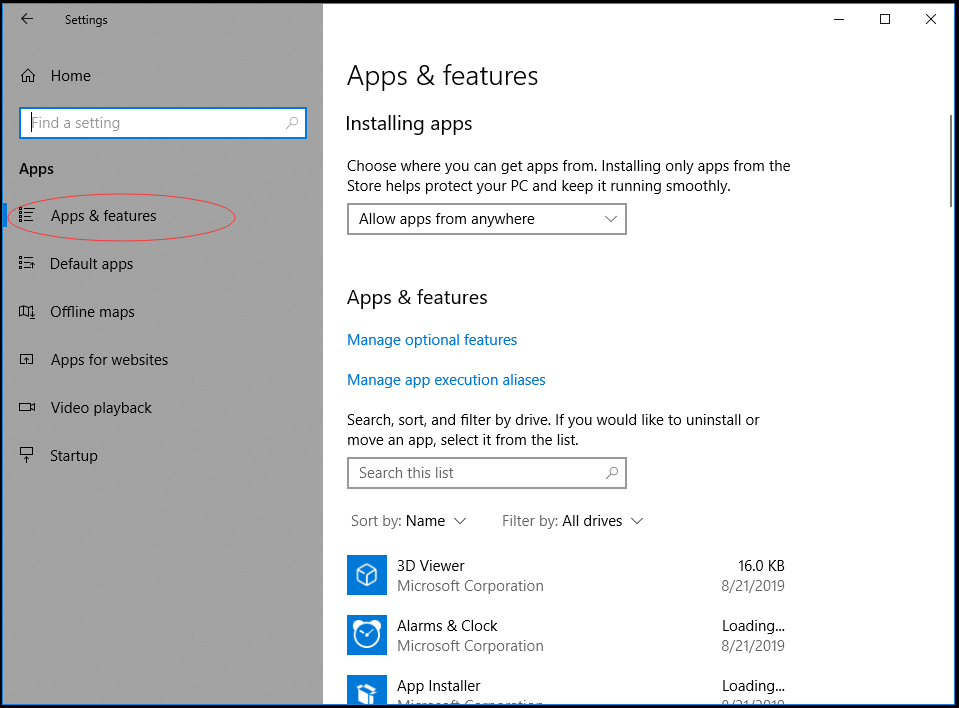
3. Select Reimage Repair and Click Uninstall to start the removal process. You will see a pop-up window informing you that the app and its related info will be uninstalled. Hit Uninstall to complete the process.
Method 3: Removal through the Add/Remove Programs Control Panel
If you prefer using Control Panel, that option is still available in the latest edition of Windows 10. However, from the Control Panel, you can only uninstall the desktop programs, not apps. Do the following:
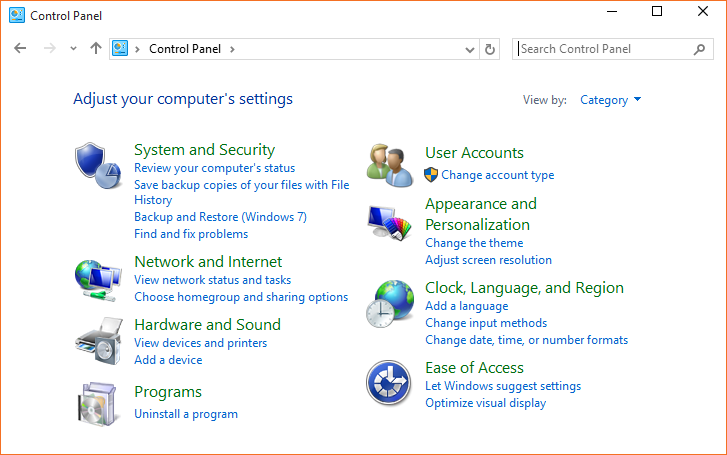
1. Right-click on the Start button (Windows logo button at the bottom-left corner of the desktop) and then click Control Panel to open it.
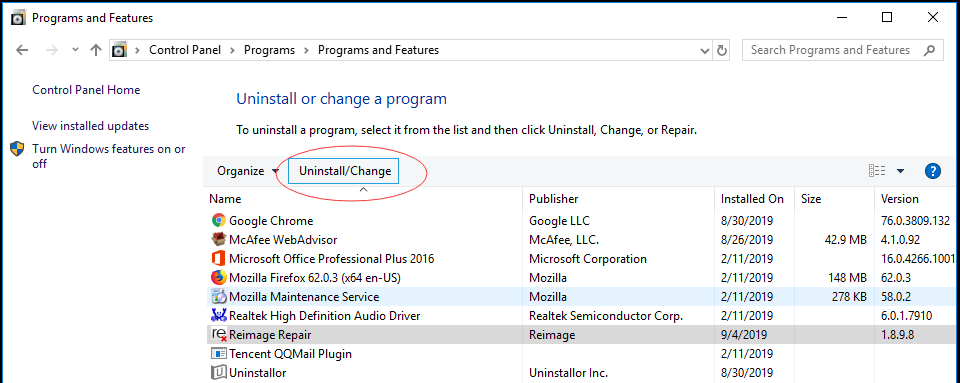
2. Go to Programs and Features (or go to Uninstall a Program if your Control Panel is in the category view).
3. Find Reimage Repair and click Uninstall. You’ll see a pop-up window asking if you’re sure you want to uninstall this program, click Yes and click through the uninstall wizard, if applicable. After it is done, it will prompt the user to Reboot their computer to take effect.
WARNING:
The above three methods may help you delete Reimage Repair, but they may NOT clear it completely out of your system. So, in the next step, you have to manually delete leftover file system and registry items. Make sure the files you delete belong to Reimage Repair, and remember to back up the registry before you make any changes to it because incorrect changes to the registry can result in permanent data loss or corrupted files.
Check the following folders and delete associated files first.
- C:\Program Files\Reimage\Reimage Repair\Reimage.exe
- C:\ProgramData\Microsoft\Windows\Start Menu\Programs\Reimage Repair
- C:\Users\{username}\AppData\Local\Temp\ReimagePackage.exe
Next, you have to delete Reimage Repair entries from Windows registry:
Press Windows + R, and type in regedit in RUN box, then press Enter. It’ll open Registry Editor.
Locate the following keys:
- HKEY_CURRENT_USER\Software
- HKEY_LOCAL_MACHINE\SOFTWARE
- HKEY_USERS\.DEFAULT\Software
- HKEY_LOCAL_MACHINE\SOFTWARE\Wow6432Node (64-bit system users will also need to check this extra key)
If you can find any keys with the name of Reimage Repair, just delete such keys.
Again, you should only attempt this if you are experienced at using the Windows Registry and know how to view and delete system and program files. For computer users who are not familiar with that, we recommend use a third-party uninstaller to complete the Reimage Repair removal with just a few clicks.
Method 4: Uninstall Reimage Repair Using A Removal Tool (Recommended)
When it comes to delete Reimage Repair remaining files or registry entries, there is nothing better than using a third-party uninstaller. There are many free and paid uninstaller programs that can get the job done instantly. Uninstallor is one of the best third-party uninstallers for Windows and Mac by providing a simplified uninstall and auto leftover scan to ensure thorough removal. It uninstalls Reimage Repair the right way, wiping every trace related to this software, even the leftovers that are usually overlooked. Even you are completely computer illiterate, you can use the program with ease and automatically remove all remnants of Reimage Repair.
Here’s how it works:
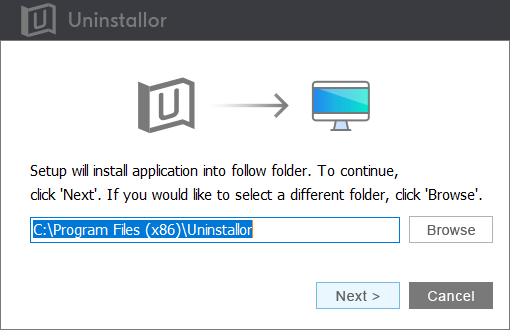
1. Download & Install Uninstallor on your machine. Uninstallor is quite lightweight and the installation is straightforward. The only option you have is to let you create a program shortcut to the desktop.
2. Launch Uninstallor. Uninstallor has a smart, clear interface that displays a list of all your installed software.
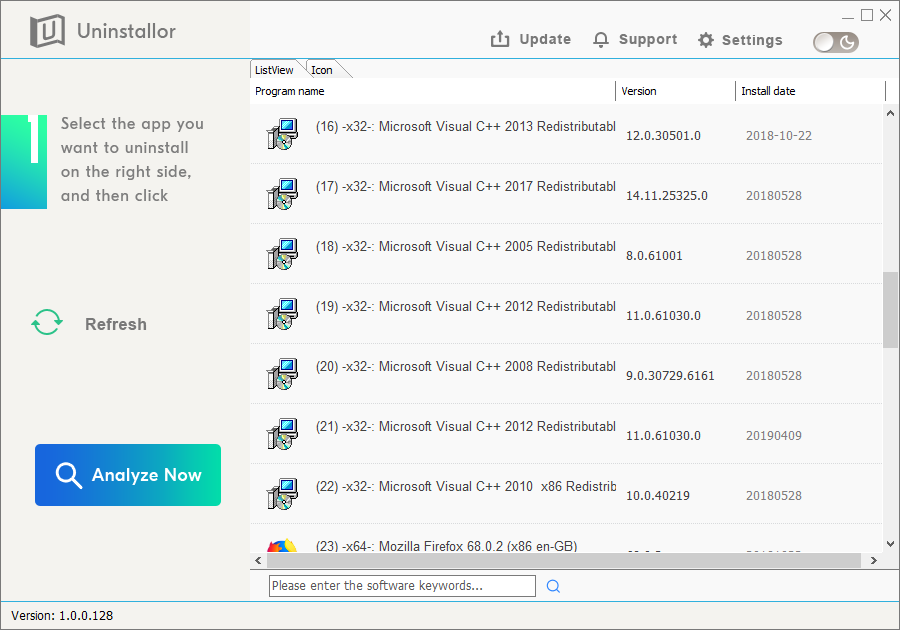
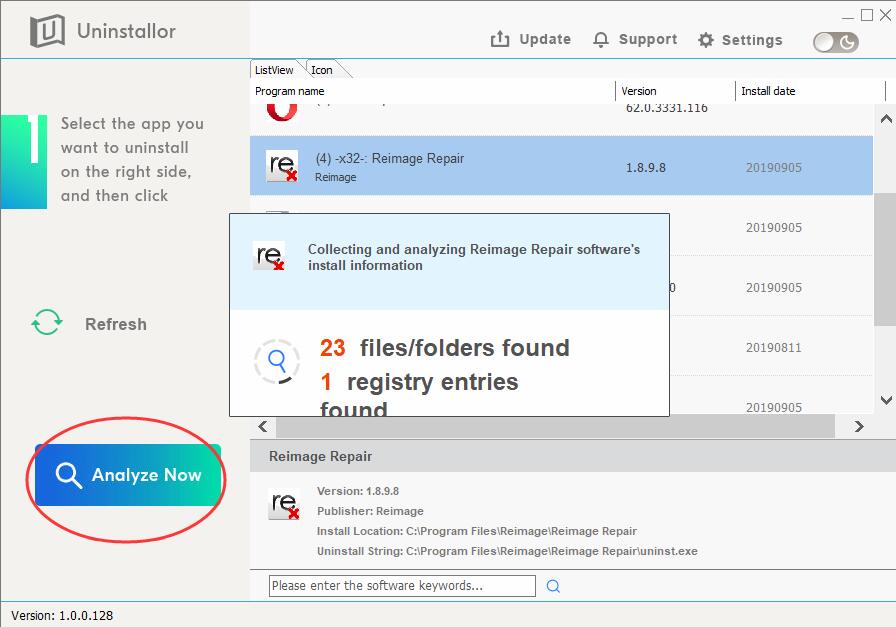
3. Scan for program components. Select the program that you want to uninstall and click on “Analyze Now” button. It will analyze all the data associated with the uninstalled program and searches for all leftover files.
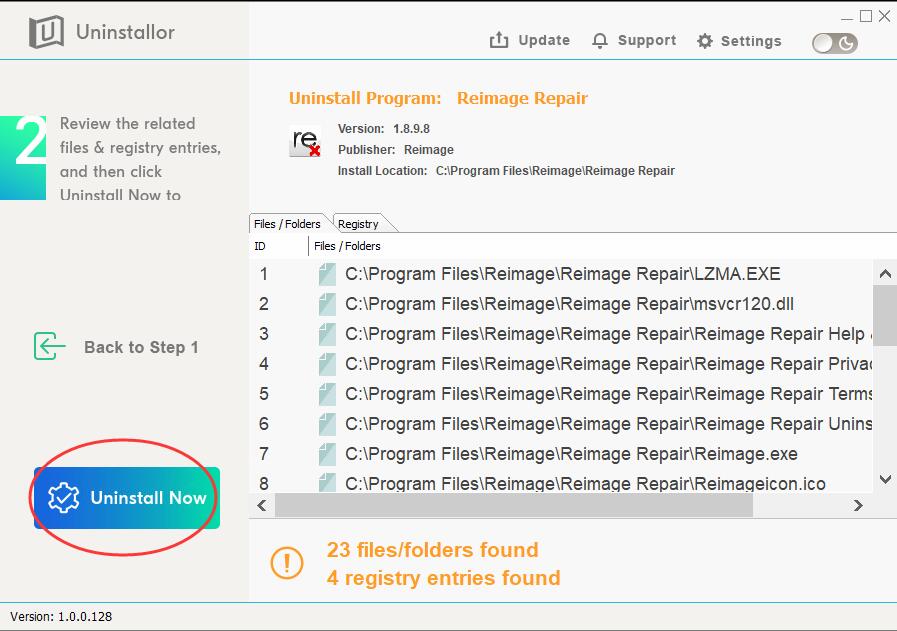
4. Perform complete removal. Click on “Uninstall Now” button to uninstall Reimage Repair completely. Next, you need to click on “Yes” to confirm the removal.
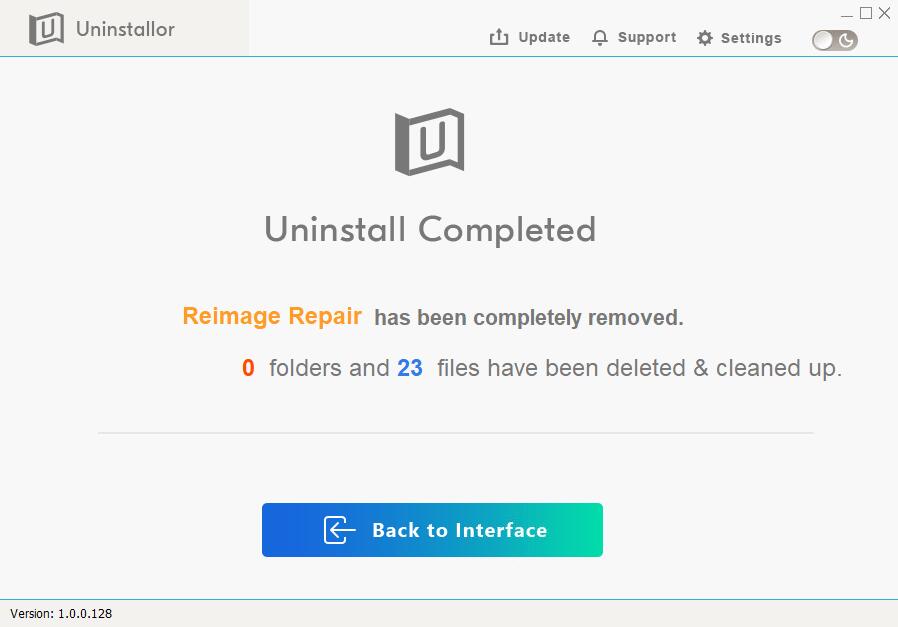
5. Wait until uninstallation is completed. When the process is completed, restart your computer to take effect.
Video Guide on How to Remove Reimage Repair in Windows 10
Conclusion:
In most case, uninstalling software is not a difficult task on your PC. You may probably get this done by using Windows built-in ‘Programs and Features’ option in Control Panel. However, for some stubborn programs like Reimage Repair, you always can’t uninstall that successfully because they leave broken/corrupt registry entries and temporary junk files. And the worse thing is, in some cases, the installation of Reimage Repair may cause system slow down issue and instant merging of pop-ups while browsing the web. But i think you may know how to remove Reimage Repair completely after reading the guides here. To completely get rid of Reimage Repair, you’d better remove all its associated files and registry entries manually. But if you are not excellent doing that, you can use a third-party uninstaller instead. There are a multitude of different third-party programs for Windows 10 that are designed specifically to make it not only possible but also easier for users to uninstall applications, Uninstallor happens to be one of the very best ones. Give it a try to uninstall Reimage Repair thoroughly in 5 minutes!
Published by Tony Shepherd & last updated on August 7, 2020 4:22 pm


Leave a Reply
You must be logged in to post a comment.